I couldn’t find a
CNC ROUTER designed for furniture making, so I had mine custom made. Now, woodworkers have some off-the-shelf choices that fit our special requirements.
Part Two. Decisions to Make
I’ve been using
CNC ROUTER services since the late ’90s to create patterns, jigs and fixture components and a few furniture parts. After years of use, the potential of a CNC ROUTER as a useful tool in woodworking was obvious. But, if I was going to make the most of it, I needed get my own machine. A couple of things were holding me back. Which machine to buy was a complicated decision. I knew what I needed, but the machine I wanted wasn’t available. That said, the major reason for the delay in getting my own CNC ROUTER was more about choosing and committing to an advanced CAD software package that I could live with for a long time.
wood CNC router
CNC router machine
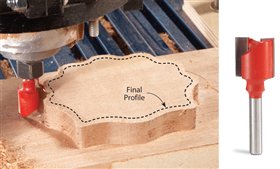
CNC Router 4 axis
CNC Router 3 axis
cnc router
5 axis CNC Router
Big Machines Don’t Fit Well in Small Shops
Until recently, most CNC ROUTERs were expensive and designed for cabinet shops who use sheet goods and are sized 4×8 or larger. Like many woodworkers, my shop space is limited. Factory or cabinet shop sized CNC ROUTERs were just too big for my needs. Here’s why. The rule of thumb for sizing equipment for furniture making is to size your power tools to the average of your larger individual furniture parts. Your equipment doesn’t have to handle the biggest piece you can imagine. When the occasional really big part comes up, you work around the problem using alternate woodworking techniques. Being flexible in how you accomplish a given task is an important part of what woodworking is all about.
This same theory works for sizing a CNC ROUTER. If you consider everything you might make, you’ll find that most furniture parts really aren’t all that big. I needed a CNC ROUTER sized for furniture making not cabinetmaking.
Deciding On CAD Software for Woodworking
I also had to commit to better design software then I was using at the time. After a career as a designer, from decades of experience I knew that good software is a critical. Great software can do much more for you then just being a simple tool for making drawings. In the right hands, it’s potentially a powerful creative tool. Once mastered, it gives you new opportunities and take you in new directions. And so, the software decision was the most difficult of the two I had to make. And, it’s the reason I didn’t buy a CNC ROUTER years sooner.
Why was it a hard choice? Because, if you’re going to use digitally based tools of any type (CNC ROUTERs, Laser Cutters, etc.) you have to make a commitment to learn CAD software – the tool you use to create your designs, and CAM software – for turning your drawings into the tool paths and the instructions that the CNC ROUTER follows. Because of its enormous range of capabilities, CAD in particular takes a commitment to dive in and learn it. I looked at many different professional packages over several years but I needed to give the contestants a more thorough evaluation. It took the commitment to get a CNC ROUTER to force me to look deeper and critically evaluate my needs and long term expectations.
And, since this question will inevitably come up, it’s important to clarify that 3D sketching software is not the same as true CAD software. The accuracy, features, toolset, versatility and potential of true CAD software – especially 3D CAD software – are critical if your intended result is CAM files that will run on CNC ROUTERs. That being said, if you already have experience in 3D sketching, it’s a great place to start as you head into the world of real CAD software.
The Cost of Software is Measured in Time. Not Dollars.
Certainly, CAD software like this can be expensive but price wasn’t my first concern. From decades using professional digital design tools I knew that the real cost in serious software is not measured in dollars. The initial cost always takes care of itself over time. The real cost is the time you put in to learn and someday master the tool. If you value your time – as you should, then time should be a major factor in your decision.
Because CAD software has so much capability and tons of features expect an investment of your time over a number of years. Digital woodworking involves creating the drawings that you’ll ultimately machine. Experience has also taught me that better quality software is often worth the added costs over a free or inexpensive solution. Unfortunately, because software can’t be touched like a beautifully made hand tool many people don’t recognize the value in it and automatically gravitate to the lowest price solution. But, like other tools in the shop, free or inexpensive software can sometimes be like living with any other cheap tool. You often get what you pay for. Inaccuracy, limitations, reliability, incompatibility and just plain being hard to learn and live with are frustrations common in both the hand tool and software worlds.
The choice of CAD software is a decision with long term consequences. In my case, I chose a highly capable 3D package with lots of room to expand.
Treat Software Like a Major Shop Tool
A more realistic approach is to consider that buying good CAD and CAM software is comparable to the process of deciding on a quality fixed tool in your workshop. It’s worth serious consideration and research on your part before you make a decision to commit.
One advantage that software has over big, heavy shop tools is you can take it home and try it out. Free trials, usually for 30 days or more give you a good chance to evaluate before you make a decision. And, don’t just poke around but also use some of the training tools that the software companies and YouTube provides.
So, What did I Do?
At the time, no CNC ROUTER manufacture made a machine available in the size, specification, level of precision and with special tweaks I considered important for furniture making, so I ended up designing the machine I needed and having it custom built.
For me the choice of CAD package had to fit both my present and future needs, be a solid tool with a lots of capabilities. And, be a tool I wanted to live with for a long time and like any other favorite tools, be a program I really liked using. For software, I chose a high-end but moderately priced 3D CAD program called Rhino3D that I’m very happy with. And, for CAM software I chose RhinoCAM, an advanced package that nicely compliments my CAD software. Because it’s so critical to digital woodworking, software will certainly be an ongoing topic in this blog.
Next up: A series of posts on how I use
CNC ROUTERs in my woodworking shop. Then we’ll start getting into some of the details of digital woodworking.